How To Decorate A Cork Board

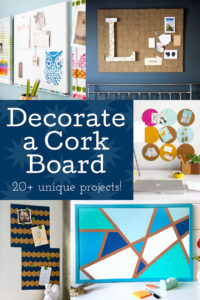
So you’ve recently acquired a cork board and are now wondering how to make it truly your own? Look no further! In this article, we will guide you through the process of decorating a cork board, providing you with creative and stylish ideas to transform this everyday item into a personalized work of art. Whether you intend to use it as an organizational tool or as a decorative piece, we’ve got you covered with tips and tricks to help you make the most of your cork board. Get ready to showcase your personality and add a touch of flair to your space!

How To Decorate A Cork Board

This image is property of modpodgerocksblog.com.

Choosing a Cork Board

When it comes to choosing a cork board, there are a few factors to consider. First and foremost, you’ll need to think about the size of the cork board. Think about your available wall space and the amount of items you’ll be pinning to the board. A larger cork board will provide more surface area for organizing and displaying your items.

Next, you’ll want to select the shape of the cork board. While rectangular cork boards are the most common, you can also find cork boards in square, circular, or even custom shapes. Think about the aesthetic you’re going for and choose a shape that complements your space.

Once you have the size and shape determined, you can move on to choosing the type of cork board. Traditional cork boards have a cork surface, but there are also options available with fabric coverings or even magnetic surfaces. Consider your needs and the types of items you’ll be attaching to the board to make the best choice for you.

Preparing the Cork Board

Before you start adding any decorations to your cork board, it’s important to properly prepare the surface. Begin by cleaning the cork board to remove any dust or debris. Use a damp cloth or sponge to gently wipe down the surface, taking care not to damage the cork.

Next, you’ll want to sand the cork board to create a smooth surface. Lightly sand the entire surface of the board using fine-grit sandpaper. This will help to remove any rough spots and create a better surface for painting or staining.

Once you have sanded the cork board, you have the option to paint or stain it. This step is completely optional and depends on the look you want to achieve. If you prefer a natural cork look, you can skip this step. However, if you want to add some color or customize the board to match your decor, now is the time to do it. Use a brush or roller to apply the paint or stain evenly, allowing it to dry completely before proceeding to the next step.

Adding a Backing

Adding a backing to your cork board can provide added stability and help protect the surface of the wall it’s mounted on. To do this, you’ll need to measure and cut a piece of cardboard to fit the size of your cork board. Use a ruler and a utility knife to carefully cut the cardboard to the desired dimensions.

Once you have your cardboard backing, you can attach it to the cork board. Apply a thin layer of adhesive or use double-sided tape to secure the cardboard to the back of the cork board. Make sure the backing is centered and aligned properly before pressing it firmly in place. This will ensure that the cork board is securely held together and ready for the next steps.

Adding Fabric

Adding fabric to your cork board can instantly transform its appearance and give it a personalized touch. Start by choosing a fabric that complements your room’s decor. It can be a solid color, a pattern, or even a textured fabric – the choice is yours!

After selecting the fabric, measure and cut it to fit the size of your cork board. Leave a few inches of extra fabric on all sides to be able to securely attach it. Lay the fabric flat on a clean surface and place the cork board face down on top of it.

To attach the fabric, start with one side and fold it over the back of the cork board. Secure it in place with staples or use a hot glue gun for a more permanent solution. Repeat this process for the remaining sides, making sure to pull the fabric taut for a smooth and wrinkle-free finish. Once all sides are secure, trim any excess fabric for a neat and clean look.

How To Decorate A Cork Board

This image is property of designimprovised.com.

Creating a Grid Pattern

Creating a grid pattern on your cork board can add a stylish and organized look to your space. Start by measuring and marking the desired grid size on the surface of the board. Use a ruler or a measuring tape to ensure accuracy.

Next, attach adhesive tape along the grid lines you marked. You can use regular masking tape or painter’s tape for this step. The tape will create the borders for each individual space in the grid pattern.

Once the tape is in place, you can start painting the spaces in the grid pattern. Choose a paint color that complements your room’s decor and use a small brush to carefully paint each space. Let the paint dry completely before removing the tape to reveal the crisp and clean grid pattern.

Using Washi Tape

Washi tape is a versatile and decorative adhesive tape that can be used to create unique designs or borders on your cork board. Start by selecting your desired washi tape patterns. You can choose a single pattern for a cohesive look or mix and match different patterns for a more eclectic style.

Apply the washi tape to the cork board, using it to create shapes, lines, or borders. You can also cut the tape into smaller pieces and arrange them in patterns or designs. Washi tape can easily be repositioned, so don’t be afraid to experiment and try different arrangements until you achieve the desired look.

How To Decorate A Cork Board

This image is property of modpodgerocksblog.com.

Adding Ribbon or Twine

Adding ribbon or twine to your cork board can create an interesting crisscross pattern and provide additional functionality. Measure and cut pieces of ribbon or twine to the desired length, keeping in mind the dimensions of your cork board.

To attach the ribbon or twine, start by securing one end to the back of the cork board with staples or hot glue. Then, stretch the ribbon or twine across the front of the cork board and secure the other end on the opposite side. Repeat this process with additional pieces of ribbon or twine, creating a crisscross pattern that allows you to tuck notes, photos, or other items between the strands.

Attaching Accessories

Adding accessories to your cork board can further enhance its functionality and make it a true organizational hub. Consider adding decorative push pins or thumbtacks in various colors or shapes. These can add a pop of color and style to your board while holding notes or photos in place.

You can also attach small baskets or containers to your cork board to hold small items like pens, paperclips, or sticky notes. Look for containers that are lightweight and have a flat back, making it easy to attach to the cork board with adhesive or small screws.

If you need to hang lightweight items such as keys or jewelry, consider using adhesive hooks. These hooks come in a variety of sizes and styles, making it easy to find ones that match your decor. Just attach them to your cork board and hang your items for easy access and organization.

How To Decorate A Cork Board

This image is property of www.housedigest.com.

Personalizing with Photos or Artwork

One of the best ways to personalize your cork board is by adding photos or artwork. Start by printing and cutting out your favorite photos or selecting pieces of artwork that you love. Arrange them on the cork board, experimenting with different layouts until you are satisfied with the arrangement.

To attach the photos or artwork, you can use small pins or adhesive squares. Pins provide a more traditional look and allow for easy swapping of photos, while adhesive squares create a more seamless and modern appearance. Secure the photos or artwork in place, making sure they are evenly spaced and straight.

Using Polaroid or Instax Films

If you’re a fan of instant photography, incorporating Polaroid or Instax films into your cork board design can add a fun and nostalgic touch. Start by taking and printing your favorite Polaroid or Instax photos. These cameras usually come with their own printing functions, making the process quick and easy.

To attach the photos to the cork board, you can use decorative clips or mini clothespins. Arrange the photos in a grid pattern or in a more random and eclectic style, clipping them securely to the cork board. This creates a unique and dynamic display that is sure to catch the eye.

Now that you have a comprehensive guide on how to decorate a cork board, it’s time to get creative and transform this versatile piece into a functional and stylish addition to your space. Remember to consider the size, shape, and type of cork board you prefer, and then follow the steps outlined in this article to prepare, personalize, and customize your board. Whether you choose to create a grid pattern, use washi tape, add ribbon or twine, attach accessories, or display photos and artwork, your cork board will become a unique reflection of your style and organizational needs. Enjoy the process and have fun bringing your vision to life!

How To Decorate A Cork Board

This image is property of www.sadieseasongoods.com.

Leave a Comment

This site uses Akismet to reduce spam. Learn how your comment data is processed.